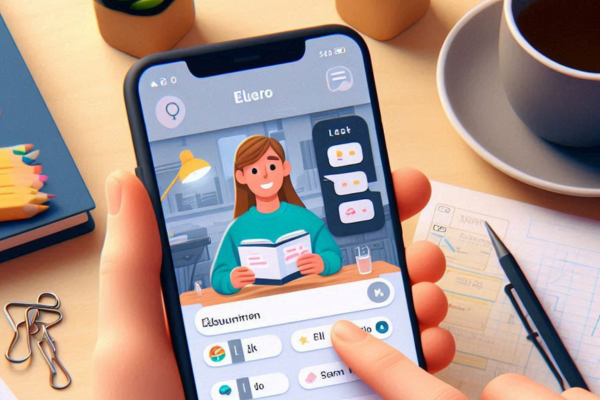
Building Flutter app for any WordPress website: A step-by-step guide
Building a Flutter app for any WordPress website can greatly enhance user experience and engagement. Follow this step-by-step guide to get started.
-
Set Up the Flutter Development Environment
Individuals first need to establish a setting for development if he or she wants to take up app development. Here’s how:
-
Install the Flutter SDK
The first thing to do is the installation of Flutter SDK on your system. Flutter offers detailed installation instructions for each operating system: For Windows and Linux platforms via the official website and for Mac OS via the Apple App Store.
-
Configure the System Path
The next process after the installation of Flutter is the configuration process of their system path this is because the command prompt has been made simple and with this, simple commands can be run at any location in the command prompt. It also implies that it will support your development chain.
-
Additional Tools
Such tools may include Git if you are working on version control or Android SDK if you are developing a platform for the situation of Android devices. Below are some of these tools, not all of them are essential during development, but they are useful and much better to have at hand.
-
Helpful Resources and Troubleshooting
The official portfolio of Flutter provides insight into the installation and setup process. And if everything seems very complicated during the software installation, do not despair: You can look for websites on the Internet that provide support from other and probably more knowledgeable programmers.
Only now can you finally focus on developing a Flutter app for any WordPress website – naturally, only if you have first set up a Flutter development environment. Continue reading the next sections of this reference guide to find out how to leverage WordPress and Flutter to build UI for an app.
-
Design your App UI/UX H3
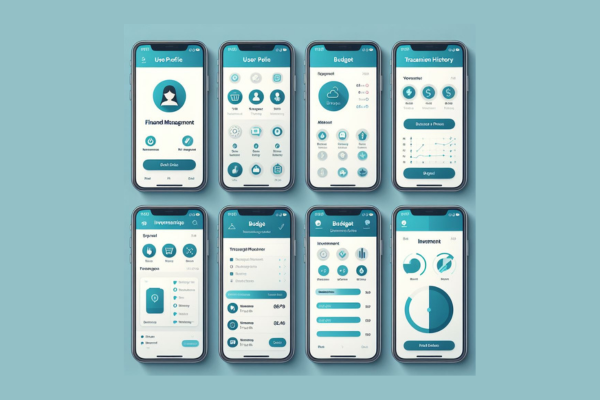
The phase of development of an app requires that the developers of the app design the UI as well as the UX of the app. Usability design contributes to demonstrating the ability of an app to be used and function in its visual and presentation. Here’s how to do it:
Plan Your Layout
Sketch Your Ideas
Create an initial visual presentation of the screen concept. Working practice: layout for main screens and main navigation.
Use Design Tools
Prototyping could be useful, for example, using Figma or Adobe XD on a computer.
Choose the Right Widgets
- Basic Widgets: Those who are familiar with the native widgets available in Flutter like Container, Column, Row, etc can go ahead and lay the foundation structure of your application.
- Interactive Widgets: Next, try to add buttons, text fields, and other stuff to improve the app and pass your first exam.
Ensure Responsive Design
- Flexible Layouts: Flex and Expanded widgets can then produce such devices with particular contents in different layouts/shapes and sizes.
- Media Queries: We can use the MediaQuery of Flutter to control the size and the orientation of the device and arrange the view accordingly to display the content.
Follow Design Principles
- Consistency: A specific app should maintain consistency in choosing the best color-compatible typography and whitespace.
- Accessibility: Check if your applications are accessible to everyone and if fonts and the descriptions of images are correct and good quality.
Test Your Design
- Prototype Testing: Exploratory research seems to become a reasonable option to determine how to improve the design by experimenting with genuine clients.
- Iterate and Improve: The designs’ forms should be pleasing to the eye, using nice and easy comments by the respondents.
User interface and user experience a statements of how a user is going to be engaging with the app as well as the feeling that the user is going to experience while he or she is using the application.
-
Integrate with WordPress data
Integrating your Flutter app for any WordPress data involves setting up a REST API on your WordPress site and making API calls from your Flutter app. Here’s a simple step-by-step guide to help you get started.
Step 1: Install and Configure a WordPress REST API Plugin
- Log in to your WordPress Admin Dashboard
- Navigate to “Plugins” > “Add New.
- Search for “WP REST API” or any similar plugin.** Popular options include “WP REST API” and “WP REST API Controller.
- Click “Install Now” on your chosen plugin, then activate it.
- Configure the plugin settings. This typically involves setting permissions to access data via the API. Follow the plugin’s instructions to complete the setup.
Step 2: Use the `HTTP` Package in Flutter
- Add the `HTTP` package to your Flutter project. Open `pubspec.yaml` and add the following line under dependencies:
| yaml |
| dependencies:
http: ^0.13.3 |
Save the file and run `flutter pub get` to install the package.
- Import the `HTTP` package in your Dart code:
| dart |
| final String apiUrl = “https://yourwordpresssite.com/wp-json/wp/v2/posts”; |
- Make an API call to your WordPress site
- Define the API endpoint. For example, to fetch post:
| dart |
| final String apiUrl = “https://yourwordpresssite.com/wp-json/wp/v2/posts”; |
- Create a function to fetch data:
| dart |
| Future<void> fetchPosts() async {
final response = await http.get(Uri.parse(apiUrl)); if (response.statusCode == 200) { // Successfully received data print(response.body); } else { // Handle error print(“Failed to load posts”); } } |
- Call the function when needed.** For example, in the `initState` of a stateful widget:
| dart |
| @override
void initState() { super.initState(); fetchPosts(); } |
Following these steps, you can easily merge your Flutter app with your WordPress website’s data. This allows you to fetch and display posts, pages, and other content directly within your app.
-
Implement app functionality
It is certainly not just the content that is showing in the new Flutter app for any WordPress site. Here’s how to enhance user engagement:
- User Authentication/Registration: The user should be allowed to add information and complete the registration process through the application. Generally, it integrates with services like Firebase for set authentication purposes.
- Search Functionality: Disable an operation mechanism that supports a finding of the concerned objects or entities. This helps to increase the ease of finding content by the individual.
- Comments and Interactivity: This is to build corporate social responsibility by allowing users to contribute their comments to posts or pages. This is because it gives a sense of connection within this app.
- Push Notifications: Engage communication with users and keep them engaged using push notifications. Update your customers about the new content or addendums or any other important news.
- E-commerce Integration: It will also be helpful to include a marketplace in the application for the website, which gets implemented on the WordPress platform and has a connection to the online store. Customers should be able to browse and look for products and also buy their cart after addition.
- Utilize Flutter Packages: In Flutter, while learning, try to make use of different packages that are useful for a task. From authentication to search capabilities and managing payments to notifications – there’s an amazing package that can simplify or enhance the existing flow.
If you implement these features in the Flutter mobile app for the WordPress website, it will keep the app alive and make the users engage more with your WordPress website.
-
Build and test your app
This section will also help you to understand whether the Flutter code runs successfully on your WordPress site or not.
- Use the flutter run Command: To initiate building the app on the already connected computer one coder a device or simulator the flutter run command is activated in the terminal after the app has been coded. This command builds the project and pushes the application to your device for you to run the tests.
- Thorough Testing: The author needs to point out that the application needs to undergo a thorough testing process and determine whether the application functions on a different device or different screen that is of different sizes. For this activity, one can try it out on different devices, both Android and iPhone phones, to determine whether the site responds well to the devices across these operating systems.
- Simulators and Emulators: Utilize test suites and simulators and emulators to test your app on targeted devices without the need to own the actual devices. This enables the person to train to such an extent that he/she can immediately experience the situation that he/she has encountered in real life and correct himself/herself if such errors were already felt during the said training.
- Identify and Fix Bugs: During testing, you may encounter bugs or errors. Use debugging tools provided by Flutter to identify and fix these issues efficiently. Common bugs include UI layout problems, API integration errors, or performance issues.
Thus if you follow all these steps and best practices it will make your Flutter application for a WordPress website well-tested and fully ready to deploy. Following the instructions, detailed in the app and ensuring that you follow the step-by-step procedure to make the app work will help ensure that you make the app work nicely for users and its testing.
-
Update, deploy, and maintain
Even when you have the Flutter app for any WordPress website in place, the work does not end there; when coding or working with the app, the other critical thing is to update and deploy the app and ensure that maintenance of the app is also done properly. Here is a brief process guide that can help you cruise through this process.
-
Version Control with Git
- Use Git: Version control systems Git enables tracking of changes that are made to your app’s code. They can be used to monitor changes, work with other users, and roll back the changes to work with an earlier version if necessary.
- GitHub and GitLab: GitHub and GitLab are some of the external tools that have repositories for storing your codes and managing versions and technologies to collaborate with other members of the team.
Setting Up a Deployment Process
- Prepare for Deployment: Before publishing the app on the Google Play Store and Apple App Store, implementation guidelines should be followed. This includes following the design and content policy.
- Automate Deployment: Use additional applications such as the Fastlane to simplify the process of deployment. This saves time and considerably eliminates errors when publishing an app.
Monitoring App Performance
- Use Analytics Tools: Apply services like Google Firebase Analytics to track the app’s performance. These tools help in understanding user behavior, crashes of the app, and other productive information.
- User Feedback: Remind users to write their responses and reviews. This tells you what orients the company positively and what introduces the negative trend.
Releasing Updates
- Regular Updates: Release new updates when you have new features, identify bugs, optimize for the latest OS versions, etc.
- Incremental Updates: Instead of doing large updates once in a while give frequent, little updates. This prevents apps from becoming unstable and helps keep the audience interested.
If you follow the above steps, you will get a functional Flutter app that is relevant and popular with users. Change management, release management, production monitoring, and production update steps must be done on your app for it to be successful.
Understanding Flutter and WordPress integration
To integrate Flutter into WordPress, one must use the WordPress REST API. This API enables Flutter developers to get content from your WordPress website. Here’s how to get started:
- Set Up Your WordPress Site: Check to see if your WordPress website is online. Activate all the necessary plugins and activate REST API.
- Install Flutter: Get Flutter from the official site and install it. Some of the IDEs you can choose from may include Visual Studio Code or Android Studio.
- Create a Flutter Project: Start a new project using the Flutter command line tool. Develop the interface of your app by creating it using Flutter’s library of widgets with graphical elements.
- Fetch Data from WordPress: Integrate the Flutter application with a WordPress site through the REST API. Archive posts, pages, and other content.
- Display Content in Flutter: Flutter has widgets that can help you fetch the content from WordPress in your app. You can use navigation and interactive features on the website to improve the user experience.
- Test and Deploy: Test your apps on different phones. Market on the Google Play Store or the Apple App Store.
Why Use Flutter for Your WordPress App?
Explore the Benefits of Flutter for Cross-Platform Development
- Cost-Effective: Create native apps for Android and iOS with a common code base lowering the timespan and resources required for development.
- Faster Development: Flutter also has hot reload functionality that helps with the iteration of the code.
- Single Codebase: Allows developers to keep a single code base for different platforms, leading to easier and simpler updates and maintenance.
Streamlined App Creation with Flutter’s Rich UI Toolkit:
- Due to pre-designed widgets related to UI, Flutter enables users to create stunning UIs.
- The hot reload is very helpful in getting to see various changes faster.
If you follow these steps and use Flutter’s capabilities well, you can create an excellent mobile app for your WordPress site.
Read More: https://primotech.com/blog/why-flutter-is-the-top-choice-for-cross-platform-app-development/
Understanding WordPress REST API and Integration
What is a REST API?
REST API is a software interface that prescribes how different programs exchange data over the Web. It enhances the sharing of information in a structured way for system interoperability.
What is the WordPress REST API?
The WordPress REST API is a function that turns the WordPress site into a JSON API by which users can access the site from a program outside WordPress. It allows content to be pulled with HTTP requests and, in general, allows for simple user administration.
Fetching Content
Using WordPress REST API you can readily make requests for posts, pages, and more. This is of great importance in displaying the content of WordPress in an application developed with Flutter.
Managing Users
REST API also provides endpoints for managing users, creating new users, and modifying or deleting existing users. This feature is useful for applications that demand sign-in and control of the user’s profile.
Popular WordPress Plugins for REST API
To enable and extend the capabilities of the REST API, you can use several popular WordPress plugins:
- WP REST API: This plugin builds upon the functionality of the default REST API and enriches it.
- JSON API: Contains a simple means of interacting with your WordPress site through various Endpoints to access different data types.
It is possible to use the REST API for WordPress to your Flutter app to develop a dynamic and highly responsive mobile application that renders the power of your WordPress website to your customers.
How does Primotech help build a Flutter app for any WordPress website?
Primotech is handy when developing a Flutter app for any WordPress website because of its workflow. It is an excellent firm that offers professional insights on the entire process, from setting up the development environment to including the custom application in WordPress with the help of WordPress REST APIs.
They offer an interface that easily accommodates any device and column widths. Besides, they offer data fetching from your WordPress site. Some other elements that Primotech adopts include authentication and pushes.
They give you the complete test and debug capabilities to ensure your application is perfect. It is also possible to place a link to your app on the main mobile app store so any user of the store can browse your WP site from a mobile phone with ease.
Conclusion
Creating a Flutter app for any WordPress site can unlock many opportunities. Flutter’s versatility and WordPress’s powerful features let you deliver a smooth mobile experience to your users. It’s not just about writing code; it’s about boosting user engagement and expanding your audience.
Dive in, explore, and experiment. Whether you’re an experienced developer or new to this, this guide gives you the confidence to start building your app. So, go ahead, transform your WordPress site into a beautiful mobile app, and see your audience grow!


 May 21, 2024